easy

BAKED KABOCHA SQUASH CHIPS by Lindsey | Dolly and Oatmeal


since there’s so many thanksgiving recipes already out there, i thought i’d come in here with something festive, yet a little lighter. personally, with 2 little ones and not much time to cook, we’re planning to order our holiday sides from a local shop (frank and i are making a turkey - it’s become our yearly thing). so i thought i’d share this super easy recipe for homemade winter squash chips!

not only are they aesthetically pleasing, but they taste so good. they definitely bring me back to my Terra chip days - a bit heartier than a potato chip, and a smidge on the sweet side. because they can be a bit time consuming (and by time consuming, i mean you’re mostly just babysitting while they bake in the oven), i like to serve them with other dippers - potato chips, crackers, cut veg, etc. they bring a super festive vibe to the appetizer table, too, which i especially love this time of year :)


baked kabocha squash chips | gf & v

print the recipe!

notes:

  • if you don’t have/can’t find kabocha squash, acorn squash is a great alternative.

  • i like to serve these chips alongside other favorite dippers - potato chips, crackers, cut veg, etc.

  • go wild with seasonings. i went plain, but you could use anything here - get creative!

  • serve this with your favorite dip - hummus (my favorite), vegan onion dip, whipped tahini, or vegan labneh.

  • these are best eaten the day they are made, but will stay fresh in a sealed bag for up to 2 days.

ingredients

  • 1/2 kabocha squash, cut in half and seeds scooped

  • 2 tablespoons extra virgin olive oil

  • 1/2 teaspoon fine grain sea salt

  • fresh ground pepper, to taste

  • flaky salt, to finish

method

  1. preheat oven to 250°F, line 2 baking sheet with parchment or a silpat, and set aside.

  2. use a mandolin to slice the squash super thin - about 1/16-inch. with your hands, toss squash slices with the olive oil, fine salt, and pepper to taste, until all slices are nicely coated (add more oil as needed, but be careful not to add too much). arrange the squash slices in a single layer on the baking sheets.

  3. bake the squash for 1 hour, rotating the sheets top to bottom, halfway through. after 1 hour flip the chips over and continue to bake them until they’re browned and crunchy, about 30-40 minutes.

  4. remove the chips as they bake and become crispy (some chips may take longer to crisp up), transfer them to a cooling rack to cool completely.

  5. once all chips are baked and crunchy, serve with a good sprinkle of flaky salt, and a good dip (like hummus!).

similar recipes:


(bean-less) kabocha squash hummus

(bean-less) kabocha squash hummus

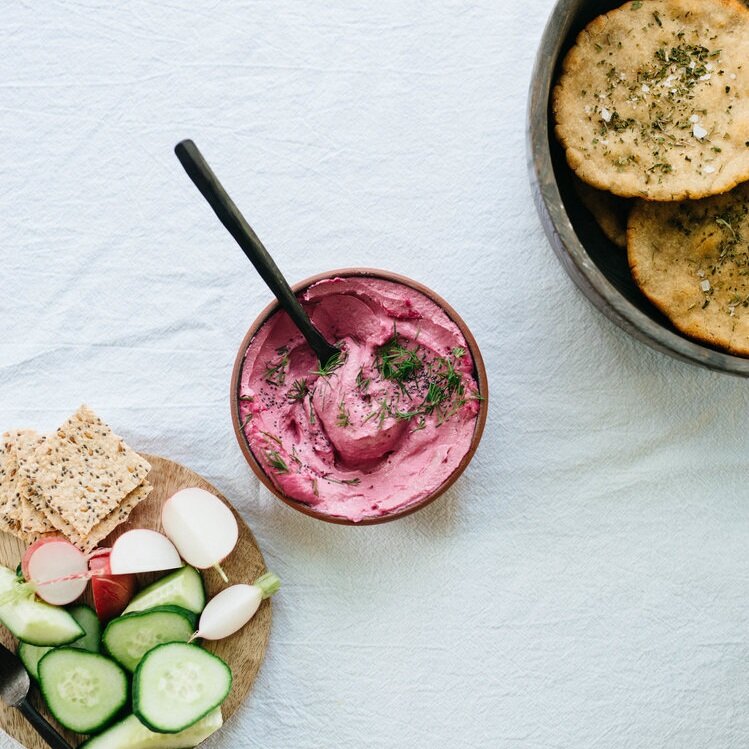
beet techina

beet techina

za’atar spiced chickpea crackers

za’atar spiced chickpea crackers

PUMPKIN SPICE TAHINI (MUMMY) BALLS by Lindsey | Dolly and Oatmeal


Bare with me. we’re getting a teeny bit crafty today, all in the name of Halloween. Truth be told, I kind of like kids crafts, I think it’s the former preschool teacher in me. But now that ames is 4, and super into all things Halloween, I wanted to surprise him with the little mummy monster balls.

These are a riff on my chocolate chip cookie dough balls from a while ago.  And while they’re just as delicious, we made a few swaps to make these a bit more festive for fall.  I love tahini with cozy, autumn spices; so pairing it with pumpkin pie spice seemed almost necessary here - it’s so good, guys!  We add a few layers of dark and white chocolate, then mummy eyeballs for good measure!  I wanted to make these a little more wholesome in anticipation of all the sugar bombs in the near future, so these balls are full of healthy fats, free of dairy, gluten, grains, and refined sugar (minus the candy eyeballs, of course!).   We’re using almond flour for the base.  From there, we use a mixture of tahini, coconut oil, and maple syrup for texture, sweetness, and binding purposes.  A few dashes of pumpkin spice and a couple pinches of salt.  A quick chocolate shell, and some white chocolate mummy drizzles, and we’re good to go.  

They’re a super quick and fun little project that requires zero baking! I got you ;)


pumpkin spice tahini (mummy) balls | gf & v

print the recipe!

notes:

  • if you don’t like/have tahini swap it for another nut butter - almond or cashew butter for a more neutral flavor, peanut or hazelnut butter for more of a distinct flavor.

  • don’t like/want pumpkin spice ball, swap for a different spice, or leave it out all together.

  • not in the festive mood, drop the eyeballs and cover your balls in your preference of dark or white chocolate. maybe garnish them with some toasted pumpkin seeds and a pinch flaky salt?

| makes 10 balls |

ingredients

  • 1 1/2 cups blanched almond flour

  • 1 teaspoon pumpkin pie spice

  • 1/4 teaspoon fine salt

  • 3 tablespoons coconut oil, melted and cooled

  • 3 tablespoons pure maple syrup

  • 2 tablespoons tahini

  • 1 teaspoon pure vanilla extract

dark chocolate shell

  • 1 bar (3.2 ounces) dairy-free dark chocolate (preferably 70% cacao)

  • 1-2 teaspoons coconut oil

white chocolate shell

  • 1/2 cup dairy-free white chocolate chips

  • 1-2 teaspoons coconut oil

  • 20 edible candy eyes

method

  1. line a baking sheet with parchment paper and set aside.

  2. in a large bowl, whisk together the almond flour, pumpkin spice, and salt. using a rubber spatula, mix in the oil, maple syrup, tahini, and vanilla. fold together until a dough forms.

  3. scoop roughly 1.5 tablespoons worth of cookie dough, roll the dough between your palms to form a smooth, uniform ball; place on your prepared baking sheet and repeat with the remaining dough.

  4. freeze dough for at least 30 minutes.

  5. while the dough balls are chilling in the freezer, make the dark chocolate and white chocolate shell. in a double boiler, melt the chocolate separately. remove from heat and stir in the coconut oil to thin it out a bit (if chocolate is too thick add more coconut oil 1/4 teaspoon at a time until it’s thick, but runs off the back of a spoon). let cool completely.

  6. once the balls are solid, use two forks and gently dip the balls one at a time in the dark chocolate. place back on the parchment and repeat with remaining balls. freeze again for another 20-30 minutes, until chocolate is solid.

  7. remove the balls, use a fork and drizzle the white chocolate over the the tops of the balls, making (rustic) horizontal lines. (you could also pour the melted white chocolate in a small ziploc bag, and snip the corner to make a piping bag.). plop 2 eyes on top, and gently press them down. go over the balls once again with the white chocolate drizzle, making the lines more visible.

  8. pop the balls back in the freezer for another hour to freeze through. remove and store the mummy balls in an airtight container in the fridge. balls can stay for up to 1 week.


HONEY APPLE CRUMB CAKE (GLUTEN-AND-DAIRY-FREE) by Lindsey | Dolly and Oatmeal


it’s been a while! i guess that seems to be a theme around here recently. since covid the dynamics have shifted and mutated, turned upside down, then right side up, and then back again. and with ames starting zoom pre-k a few weeks ago, our roles have shifted once more. so i’ve hit the pause button on all things work for the time being. but! i’m popping in here quick to share this spiced honey and apple cake that’s super cozy, and perfect for celebrating rosh hashanah this weekend.

this cake in an iteration of this cake from quite a few years ago.. since then, i’ve tweaked the recipe a bit replacing some of the sugar for honey, and replacing the crumble topping altogether with a very large crumble dome (reminiscent of a crumb cake top - so good!). there’s a good bit of cozy spice, too. cinnamon, and nutmeg were my choice here, but you could use whatever you like, really. i call for tart, crisp apples; anything too sweet and soft won’t hold up very well here, and could quickly make the cake overly sweet. it’s a really easy cake that utilizes a lot of pantry staples, and a few basic ingredients from your fridge. i hope this one makes it into your autumn baking rotation! it’s so good. guys 🥰


honey apple crumb cake | gluten & dairy-free

print the recipe here

| makes one 8-inch round cake |

notes:

  • i call for crisp, tart apples below, some of my favorites include: honeycrisp, gala, braeburn, and pink lady.

  • i also call for plant-based yogurt. this can be a little tricky since a lot of plant-based yogurt consistency’s vary. i used this yogurt, but if you can’t find it i would suggest these: culina or anita’s

INGREDIENTS

crumb topping

  • 1 cup oat flour

  • 1/2 cup monkfruit sweetener (or sweetener of choice)

  • 1/2 teaspoon cinnamon

  • big pinch of fine sea salt

  • 1/4 cup melted coconut oil

cake

  • 1 cup brown rice flour

  • 1/2 cup oat flour

  • 1 teaspoon baking powder

  • 1/2 teaspoon baking soda

  • 1 teaspoon ground cinnamon

  • 1/2 teaspoon ground nutmeg

  • 1/2 teaspoon fine sea salt

  • 2 large eggs, at room temperature

  • 1/4 cup melted coconut oil

  • 1/3 cup coconut sugar

  • 1/3 cup raw honey

  • 1 teaspoon pure vanilla extract

  • 1/2 cup unsweetened plant-based cultured yogurt

  • 1 1/2 crisp tart apples, peeled, cored and sliced into 1/4-inch pieces

  • confectioner’s sugar, for topping

METHOD

  1. preheat the oven to 350°F, oil an 8-inch springform pan and line the bottom with parchment paper; set aside.

  2. make the crumb topping. with a fork, whisk together the flour, sweetener, cinnamon and salt; drizzle in the coconut oil and mix until combined, pop in the refrigerator while you make the cake.

  3. make the cake. in a large bowl, whisk together the flours, baking powder, baking soda, cinnamon, nutmeg, and salt; set aside. in another large bowl, use an electric mixer on low to beat together the eggs and oil together; then add the sugar, honey, and vanilla; mix on low until combined. lastly, fold in the yogurt.

  4. 1/3 at a time, add the flour mixture until completely combined.

  5. push apple slices vertically into the cake as far down as they will go. remove the crumb topping from the fridge and use your fingers to break it up a bit into clumps; evenly distribute crumbs over top of the cake.

  6. bake for 50-60 minutes, until a cake tester inserted into the center of the cake comes out clean. remove from oven and place on a rack; let cool completely before removing the sides of the pan and serving. dust with confectioner’s sugar before serving.


similar recipes:


A SIMPLE PLUM & HAZELNUT TORTE

A SIMPLE PLUM & HAZELNUT TORTE

GRAIN-FREE APPLE CIDER DOUGHNUTS

GRAIN-FREE APPLE CIDER DOUGHNUTS

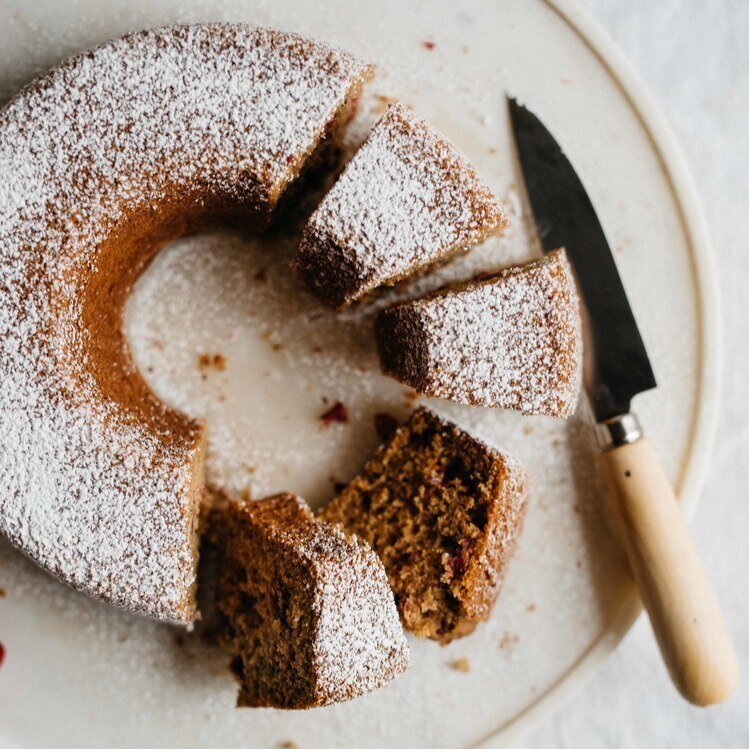
CRANBERRY, LEMON & POPPY SEED CAKE

CRANBERRY, LEMON & POPPY SEED CAKE